Kale Chips


These kale chips are the easiest thing to make and the most addicting snack food I have ever had. I've even snuck this healthy snack into the theatres. That sounds kind of weird, but it's just so good. 

Ingredients:
2 Tablespoons of Olive Oil
1 Head of Kale 
Sea salt

Spread out the kale onto a baking sheet and drizzle the olive oil evenly across all of the greens. Preheat oven to 375 degrees F. Once the oven has heated up, put the baking sheet of kale in and leave it for 2:30 minutes. When done, sprinkle sea salt all over. Then it's ready to serve! 


Cravings // Pale Pink

1. Essie Nail Polish "Spin The Bottle" 
4.  Call It Spring Bag: Cheyenne Cross Body Bag

Something about pale pink to me screams out spring. I find my self shopping and all I have is an online shopping cart full of the same pink shade. I think I have a problem.


DIY // Kimono


All of a sudden, I started having this obsession with kimonos. They're just so simple, light and looks cute with every outfit. But sometimes they can be costly. The first kimono I bought was thrifted and therefore was super cheap. Then I saw on forever 21 that they were $30. That's $30 I don't really want to spend. So I found an alternative that only cost me $2! 
What you will need: 
  • Large Scarf (I bought mine from Ardenes, it was 5 for $10)
  • Scissors
  • Pins
  • Ruler
  • Sewing Machine
  • Iron


The scarf I have here is 72x40 Inches. First, fold your scarf in half by putting the long sides together. 
If your scarf has a right and a wrong side to it - for example, one side is more vibrant then the other - take the vibrant side (right side) and fold it into each other, so the dull side (wrong side) is showing on the outside. 


Here is a diagram to help you throughout the steps to get a better idea of what you're working with. As you can see, the top is where the fold is when you folded the scarf in half. Therefore at the bottom, you can see the opening. 


Starting at the fold at the top of the scarf, measure a good amount of length for an arm hole. For mine, I left the hole 10 inches wide.


Pin this spot for reference for the next step. Do the exact same thing to the other side.


Now, starting from the end of the scarf where the opening is, start sewing at the corner (about 2 cm away from the edge), all of the way up until you get to the pin. Look at the guide in the beginning of this post for reference. Be sure to back stitch at each end.
I recommend you use a sewing machine for this just to be sure to have a secure seam. But you can also hand stitch this whole kimono if you would like to. It will take a bit longer, but if you don't own a sewing machine or don't know how to use it, hand stitching is always an alternative. Since kimono's are usually loose and flow, if you make a mistake on a seam it'll be hard to notice when you are wearing it.


Once each side is sewn up to the pin, lay your scarf back down so you can see it better. Now at the bottom of the scarf where the opening is, find the centre and cut up all of the way to the the fold at the top of the scarf. This will be the front opening of your kimono. Be sure to only cut the top layer of the scarf.


Take both of the cut sides from the front of the kimono and fold them half an inch in. These next few steps are to help hide the choppy cutting areas and just make everything look neater. Make sure when you are folding it, that you are putting the fold to the outside.


Grab your iron and use it to press the folds so there will be a crease in the fabric. This will help with the next step. You can also pin the fold over if the iron isn't keeping the fold down from the heat.


Now starting at the open side of the scarf again, sew each fold down (separately) all of the way to the top of the scarf where the fold is.


Once done with sewing the folds, cut off all of the unnecessary strings hanging from your scarf. Then flip it right side out and your kimono is completed!


Chocolate Covered Pretzels


Decided to make myself a little snack!
It's pretty straight forward if you wanted to make them. Melt the chocolate, dip the pretzel, sprinkle the sugar, and eat!

xoxo. Maria

Currently Loving


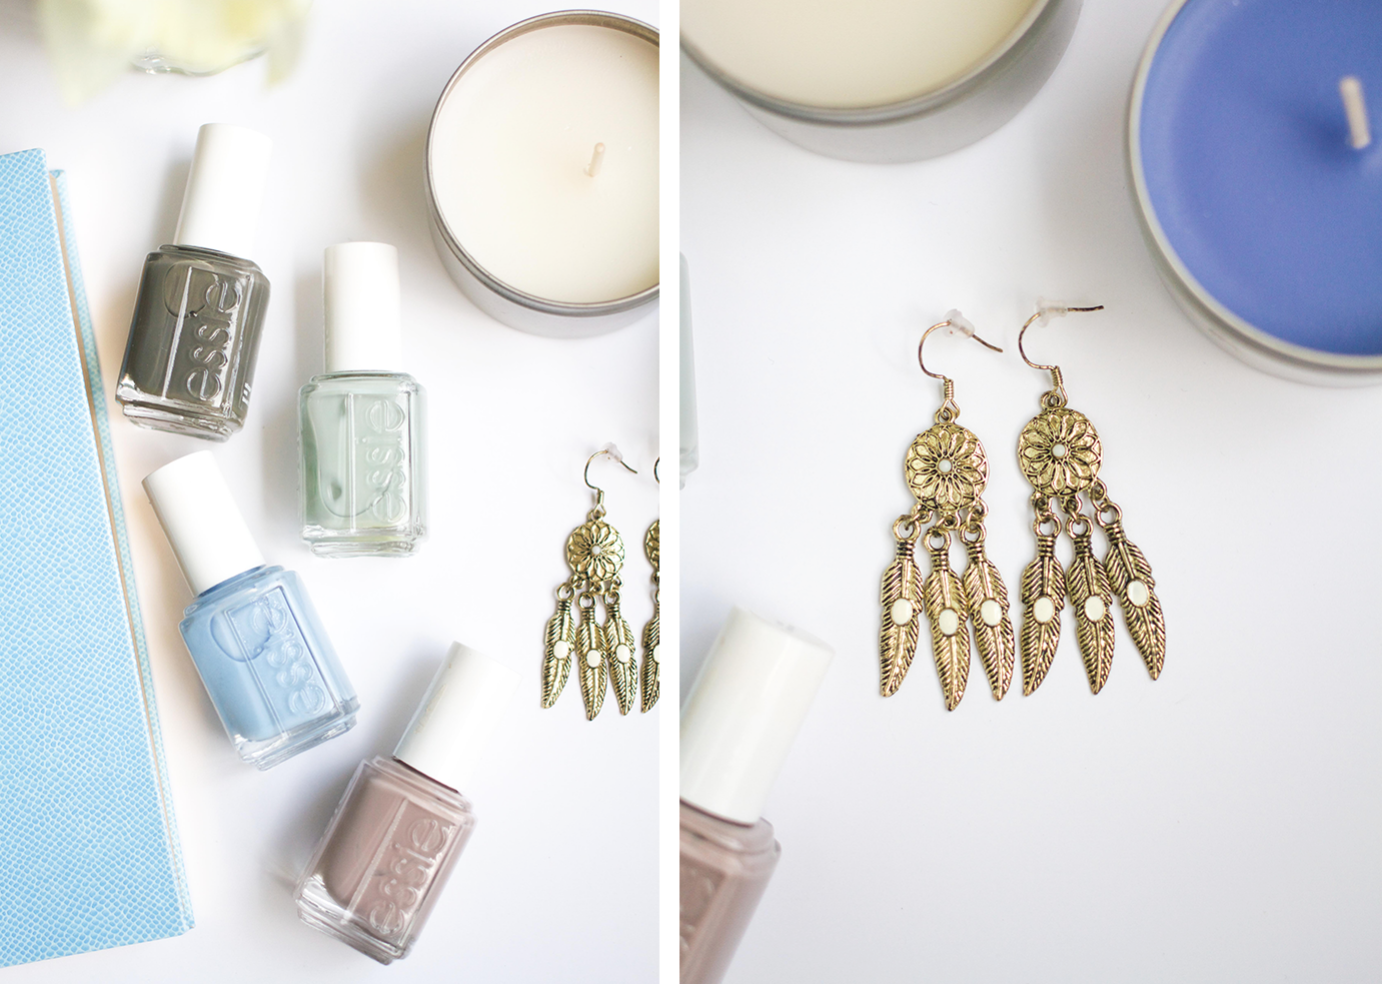
I was going through the things I currently love, and found that they all had a cute little blue and cream colour scheme to them! I lucked out. 
So first on my list is my little blue book. I received this for my Birthday from a friend and I write in it all of the time. Just little reminders and such. But it's perfect because it fits right in my purse and it's super cute.
I've also been having an obsession with candles. This photo doesn't give my candle collection justice, there is a lot more where this came from. I found these two little candles at the dollar store and their scent is vanilla and blueberry pie. They smell so good!
Another dollar store steal that I found was the Essie nail polish. Normally they cost $15, and I bought them for $3! So I couldn't pass this opportunity to pick them up. 
I picked up the dream catcher earrings from Ardenes the other day. I love these because they are super light. I get really picky about hanging earrings because I always feel like they pull too hard in my ear lobe and I'm afraid it's going to rip right through my ear. So when I found a cute pair, they were for sure in my shopping bag.
Finally, who doesn't love flowers in May? My boyfriend picked out some of these flowers and brought them to me. They just added a nice spring touch to these photos. 

xoxo. Maria 

Words

I just thought this was a cute little spring piece of word art I wanted to share today. I found this off Pinterest and it can also be found on my [positivity] board. I'm loving water coloured anything right now, so I was immediately drawn to this. 

Source // Unknown

xoxo. Maria 

LookBook // May Melodies


Tonight is my old high school's music performance (aka May Melodies) and I put together a pretty cute outfit for it. I feel likes it's a music festival/indie type of look. 
To let you in on a secret, I had to wear the hat. Why you ask? Well, you see, I bleached my hair from a box, and the roots turned out orange (ooooooops)! So I'm going to be wearing hats for a few days until my hair appointment. 

Hat: Forever 21 / Kimono: Thrifted / T-shirt: Forever 21 / Ring: Forever 21 / Skirt: Forever 21 / Bracelet: Forever 21 / Shoes: American Eagle

xo. Maria 


Berry Smoothie


 I've been inspired lately to eat healthier. So, I stole my boyfriends blender and just started to actually make myself healthy snacks.
So this is a pretty simple smoothie, but it was delicious and I just wanted to share.

Ingredients:
-1 1/2 Cups of frozen mixed berries
-1/2 Cup of Milk
-1/2 Cup of Vanilla Yogurt
-1 Cup of Spinach
-1/2 Cup of Kale

Then blended on high until smooth.
Super easy! That's the main reason I love smoothies. You can just whip together anything and it's always satisfying for me!

Happy Blending!

xo. Maria


Kitty


I'm no crazy cat lady, but when I get home, all I want to do it find my cat and hold onto her. I love when animals are willing to give you so much love. She's just so comforting.
My sister bough her last summer and I fell in love with her instantly. Her name when we got her was Saki. But that never stuck. Since my siblings are still young, they just kept calling her kitty and now she recognizes her name as Kitty. It's not very unique, but it'll do. So, here is my cat, Kitty.

xo. Maria

I've been home for a week now after completing my first year of college.
I'm doing the usual job hunting, family events and business work as usual. The difference now, is that I actually have free time to work on my personal blog (yay!) and have interesting stuff. Instead of me just posting my everyday breakfast for all of you to see. I mean, I do eat some pretty mean looking waffles. But I can do better, and that's my plan this summer. Blog, blog and more blogging!

xo. Maria

Blogger template designed By The Sunday Studio.